Most people have been in a phone call where they wished, somewhere around minute three, that they were recording it.
Maybe it was a contractor laying out the scope of work for a renovation project. Maybe it was a customer service representative finally agreeing to a refund after forty minutes on hold. Maybe it was an elderly relative telling a story about the family’s history — the kind of story that won’t be told again. Maybe it was something more serious: a creditor making a verbal agreement, a tenant confirming what the landlord promised, a doctor explaining a treatment plan that needs to be referenced later.
Whatever the reason, the impulse to hit record is completely understandable. Phone calls are ephemeral — once they end, the words are gone, and memory is a notoriously unreliable archive. Recording creates a permanent record that can be replayed, transcribed, shared, or stored.
Android handles this better than most people realize. Depending on your device manufacturer, your region, and what you’re willing to install, you have anywhere from two to five different options for recording phone calls — ranging from the native Phone app to Google Voice to dedicated third-party apps to surprisingly low-tech solutions involving a second device. Each method has its own strengths, limitations, and practical use cases.
This guide covers every viable approach in detail, including the legal considerations that must be understood before you start recording anyone, the best third-party apps available, how to find your recordings after the fact, and a section for parents who want to monitor their child’s phone environment in real time.
Before You Record: The Legal Landscape
This section isn’t optional reading — particularly if you’re in the United States or European Union. Recording phone calls without proper disclosure sits in a gray area in some jurisdictions and is outright illegal in others.
One-Party vs. Two-Party Consent
The core legal distinction in call recording law is between one-party consent and two-party consent (also called all-party consent).
One-party consent means that only one person on the call — typically you — needs to be aware of the recording. You can record without telling the other person. Most US states operate under one-party consent rules at the federal level under the Electronic Communications Privacy Act (ECPA), though state law can override this.
Two-party consent (all-party consent) means that every person on the call must be notified and must agree before recording begins. States with all-party consent laws in the US include:
- California
- Delaware
- Florida
- Illinois
- Maryland
- Massachusetts
- Michigan
- Montana
- Nevada
- New Hampshire
- Oregon
- Pennsylvania
- Washington
In these states, recording a phone call without notifying all parties is a criminal offense — not just a civil liability. The penalties vary, but criminal charges are a real possibility for violations, particularly in California, which has some of the strictest call recording laws in the country.
Outside the United States, the picture is similarly varied. In the European Union, the General Data Protection Regulation (GDPR) treats recorded calls as personal data and requires explicit consent from all parties before recording in most scenarios. In the United Kingdom, the Regulation of Investigatory Powers Act (RIPA) and related regulations apply. Canada, Australia, and most other developed countries have their own frameworks.
Practical Recommendations
Before recording any call:
Research your jurisdiction’s specific laws. The Reporter’s Committee for Freedom of the Press maintains a US state-by-state guide to recording laws that’s useful even for non-journalists. For international users, a quick search for “[your country] phone call recording law” will typically turn up the relevant statute.
When in doubt, tell the other party. A simple “I’d like to record this call for my records — is that okay with you?” resolves consent questions instantly, and most people agree without objection. For business calls especially, it’s standard practice.
For business contexts, note any verbal agreement. If you’re recording a customer service call, sales agreement, or professional consultation, stating “I’ll be recording this call” at the beginning also serves as documentation that the call happened and that both parties were aware.
With that foundation established, let’s look at the actual methods.
Method 1: Use the Built-In Call Recording Feature in the Phone App
What It Is and Why It’s the Best Starting Point
The majority of Android devices running recent versions of Android include a native call recording feature built directly into the default Phone app. This is the most seamless method available — no third-party apps required, no workarounds, no audio quality compromises from recording through a second device’s microphone.
The catch is availability. Due to the patchwork of regional laws described above, Google and individual Android manufacturers have restricted call recording features in certain countries. In two-party consent states and countries, the built-in recording feature either doesn’t appear at all or triggers an automatic announcement to all parties that the call is being recorded — which is actually legally required.
The practical rule of thumb: if you’re in a one-party consent jurisdiction, you’ll likely find the feature available. If you’re in a two-party consent jurisdiction, the feature may either be absent or may announce the recording automatically.
How to Check Whether Your Device Has Built-In Call Recording
Open the Phone app on your Android device. During an active call (you may need to call someone to test this), tap the three-dot menu (⋮) in the top-right corner of the call screen. If “Record Call” appears as an option, your device and region support built-in recording. If it doesn’t appear, your device or region restricts it.
You can also check before making a call: go to Phone app → Three-dot menu → Settings and look for a “Call Recording” or “Record Calls” section in the settings menu.
Setting Up Automatic Recording
Most devices with built-in recording allow you to configure automatic recording for specific scenarios so you don’t have to remember to tap “Record” manually during every call.
Step 1: Open the Phone app on your Android device.
Step 2: Tap the three-dot menu (⋮) in the top-right corner and select Settings.
Step 3: Scroll down to find Call Recording or Record Calls and tap it.
Step 4: You’ll typically see options including:
- Always Record — records every call automatically
- Always Record Unknown Numbers — records calls from numbers not in your contacts
- Always Record Selected Contacts — records only specific contacts you choose
Step 5: To enable recording for selected contacts, choose “Selected contacts,” then tap the checkbox icon to add specific numbers or contacts to the auto-record list.
Recording a Single Call Manually
If you don’t want automatic recording and prefer to record specific calls as they happen:
Step 1: Make or receive a phone call normally.
Step 2: During the call, tap the three-dot menu (⋮) on the call screen.
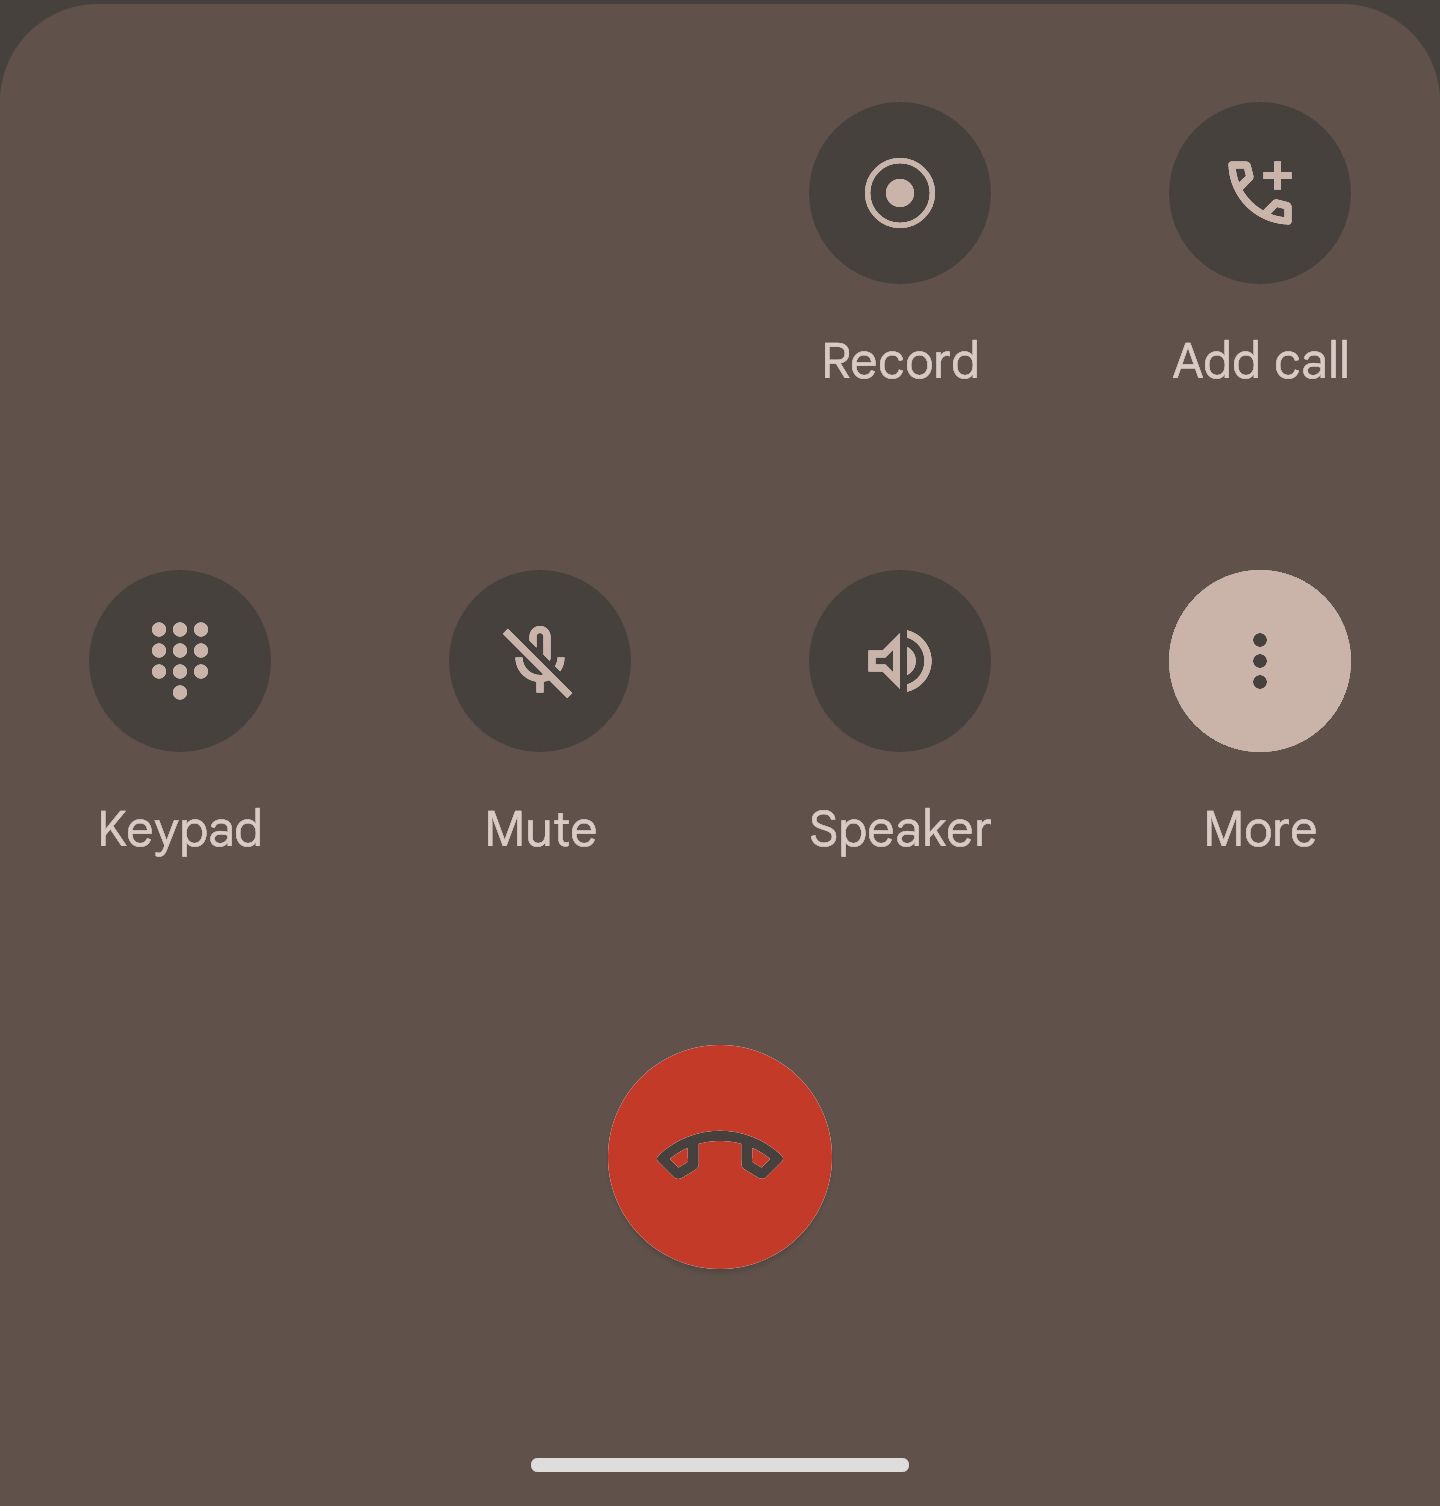
Step 3: Select Record Call. A recording indicator will appear on screen — a small microphone icon or a red dot — confirming that recording has started.
Step 4: To stop recording, tap the three-dot menu again and select Stop Recording, or simply end the call.
Finding Your Recordings
Recordings made through the built-in Phone app are generally saved in one of two places:
- Directly in the Phone app: Open the Phone app, go to the Recents tab, find the recorded call, and tap it. A Play button should appear alongside the call details.
- In internal storage: Open your Files app and look for a folder called “Recordings,” “Call Recordings,” or “Phone.” The audio files are typically saved as MP3 or M4A format.
The exact folder name varies by manufacturer — Samsung devices typically save to Internal Storage → Recordings → Call, while Google Pixel devices save to Internal Storage → Recordings.
Manufacturer-Specific Notes
Samsung Galaxy: Samsung’s built-in call recorder is one of the more robust manufacturer implementations. Access it through Phone app → Three-dot menu → Settings → Record Calls. Samsung devices in supported regions offer both automatic and manual recording, with recordings saved to Internal Storage → Recordings → Call.
Google Pixel: Google Pixel phones running Android 9 or later support built-in call recording in select regions. The feature appears as a “Record” button directly on the call screen when available.
OnePlus/OPPO/Realme: These devices typically include call recording through the Phone app settings under similar menu paths. Recording may trigger an automatic announcement to the other party depending on your region.
Xiaomi/Redmi: MIUI (Xiaomi’s Android skin) includes a call recorder accessible through the Phone app settings. Recordings are saved to Internal Storage → MIUI → sound_recorder → call_rec.
Method 2: Use the Screen Recording Feature
What It Is
Screen recording captures everything happening on your display as a video, with audio. While it’s primarily a tool for recording gameplay, tutorials, or screen activity, it can also capture the audio from a phone call in progress — effectively functioning as a call recorder even on devices where dedicated call recording isn’t available.
This method works because Android’s screen recorder typically includes an option to capture microphone audio, which picks up the call audio from the phone’s speaker.
Setup and Usage
Step 1: Swipe down from the top of your screen to open the Quick Settings panel (you may need to swipe down twice to see the full panel).
Step 2: Look for the Screen Recorder tile. If it’s not visible, tap the pencil/edit icon to customize Quick Settings tiles and add Screen Recorder to the panel.
Step 3: Tap Screen Recorder to start. You’ll typically see a brief countdown before recording begins.
Step 4: In the recording options prompt, ensure “Microphone” or “Device and Microphone Audio” is selected, not just “Device Audio” — this ensures the external audio from the call (what you’re saying and what the other person says) is captured.
Step 5: Make or receive the phone call. The screen recording will run simultaneously, capturing both the on-screen call interface and the audio.
Step 6: When the call ends, stop the screen recording by tapping the recording indicator in the notification bar. A notification will confirm the recording has been saved.
Where Recordings Are Saved
Screen recordings are typically saved to your device’s Gallery app in a folder called “Screen recordings” or “Screen Recorder,” depending on the manufacturer. They’re saved as video files (MP4), which means you get both a visual recording of your screen and the audio — though for call recordings, only the audio will be relevant.
Limitations of This Method
The screen recording method has a few significant drawbacks compared to dedicated call recording:
Audio quality can be inconsistent. The microphone captures ambient room sounds as well as the call audio. If you’re in a noisy environment, background noise will be prominent in the recording.
Speaker needs to be on. For the microphone to capture the other person’s voice effectively, your phone needs to be in speaker mode during the call — which may not always be practical.
File size is larger. Video files take up more storage than audio-only recordings.
Not all devices support microphone audio in screen recording. Some manufacturers restrict audio capture during screen recording. Test this on a non-critical call before relying on it.
Despite these limitations, screen recording remains a practical fallback for devices where native call recording is unavailable.
Method 3: Record Calls With Google Voice
What Google Voice Is
Google Voice is a free telephony service from Google that provides users with a dedicated phone number — separate from their carrier number — that can be used to make and receive calls and texts over the internet. It works on Android, iOS, and through a web browser, and it routes calls through VoIP (Voice over Internet Protocol) rather than traditional cellular connections.
One of Google Voice’s longstanding features is the ability to record incoming calls. This makes it a useful option for anyone who wants a reliable, built-in recording capability without installing a third-party app.
The key limitation to understand upfront: Google Voice call recording only works for incoming calls, not outgoing ones. If you need to record a call you’re initiating, you’ll need a different method.
Setting Up Google Voice Call Recording
Step 1: If you don’t have a Google Voice account, go to voice.google.com and set one up. You’ll be assigned a Google Voice phone number. The basic service is free.
Step 2: Open the Google Voice app on your Android device (or visit the web interface).
Step 3: Tap the three-line menu (☰) and go to Settings.
Step 4: Find and enable “Incoming call options.” This setting is what activates the ability to record calls.
Step 5: Once enabled, the next time you receive an incoming call through your Google Voice number, you can press 4 on the dial pad during the call to start recording.
Step 6: An automated announcement will play to all parties on the call: “This call is now being recorded.” This is mandatory — Google Voice does not allow silent recording. The announcement serves as automatic compliance with two-party consent laws.
Step 7: Press 4 again to stop recording, or end the call normally.
Accessing Google Voice Recordings
After the call ends, recordings are accessible in two ways:
- In the Google Voice app: Go to your call history and tap the recorded call. A playback option will appear.
- By email: If you have email notifications enabled in Google Voice settings, recordings are automatically emailed to your Google account as audio attachments.
Why the Built-In Announcement Matters
The mandatory recording announcement that Google Voice plays is frequently cited as a drawback — but for users in two-party consent jurisdictions, it’s actually a feature. It provides automatic legal compliance without requiring you to personally disclose the recording, which reduces the risk of inadvertent legal violations.
For users in one-party consent regions who prefer unannounced recording, Google Voice’s mandatory announcement may be a dealbreaker — in which case the built-in Phone app method or a third-party app would be more suitable.
Method 4: Use an External Recording Device
What It Is
Sometimes the simplest solution is the most reliable. An external recording device — a standalone digital voice recorder, or a recording app running on a second phone or tablet — can capture phone call audio without any interaction with your primary phone’s software whatsoever.
This method sidesteps all questions of software compatibility, regional restrictions, and app permissions because it doesn’t use your Android phone’s recording capabilities at all.
Using a Standalone Digital Voice Recorder
Standalone digital voice recorders are small, dedicated devices designed to capture high-quality audio. They’re widely available from electronics retailers and platforms like Amazon at a range of price points.
Setup:
Step 1: Purchase a digital voice recorder with a built-in microphone (most include one) or an external microphone that connects to your phone’s headphone jack or Bluetooth port.
Step 2: Before the call, place the voice recorder near your phone’s speaker — ideally within 6–12 inches for clear audio capture.
Step 3: Start recording on the external device.
Step 4: Make or receive the phone call, keeping your phone in speaker mode so audio from both sides is audible in the room.
Step 5: After the call ends, stop recording on the external device. Transfer the audio file to your computer or phone for storage.
Using a Second Phone or Tablet
If you have access to a second smartphone or tablet, it can function as a voice recorder with no additional hardware.
Step 1: Install a voice recording app on the second device. Most Android and iOS devices come with a default voice recorder app. Free options like Otter.ai (which also transcribes audio automatically) or Google’s built-in Recorder app for Pixel phones work well.
Step 2: Begin the call on your primary Android phone.
Step 3: Place the second device close to your primary phone’s speaker.
Step 4: Start recording on the second device. Ensure the room is reasonably quiet to minimize background noise.
Step 5: After the call, save and access the recording on the second device.
Advantages and Disadvantages
The external device approach has a notable advantage: it’s completely independent of your primary phone’s software, settings, or regional restrictions. If your carrier or manufacturer has blocked call recording, if you’re on an older Android version without built-in recording, or if every third-party app you’ve tried has failed, this method will still work.
The disadvantages are practical: audio quality depends on room acoustics, speaker volume, and the quality of the recording device’s microphone. If the speaker volume is low or there’s significant background noise, the recording may be difficult to understand. And like the screen recording method, it requires speaker mode to capture both sides of the conversation.
Method 5: Third-Party Call Recording Apps for Android
For users whose devices don’t have built-in call recording and who find external devices impractical, third-party apps bridge the gap. The Android ecosystem has a number of well-established call recording applications with years of user feedback behind them.
A note of caution: Google has progressively restricted third-party apps’ ability to access call audio through Android’s APIs, particularly in Android 10 and later. Some apps that previously worked via the Accessibility API had that access revoked in 2022. As a result, not all call recording apps work on all devices — compatibility depends on your Android version, manufacturer, and region.
The following apps have maintained compatibility across a wide range of devices as of the most recent versions.
App 1: Automatic Call Recorder Pro (ACR)
Automatic Call Recorder Pro by NLL is one of the longest-running and most downloaded call recording apps on Android — it has been maintained and updated through multiple Android API changes, which is a meaningful signal of reliability.
What it does:
- Automatically records all incoming and outgoing calls without requiring manual activation
- Saves recordings in MP3, AAC, AMR, WAV, and other formats depending on your preference
- Allows selective recording — you can whitelist or blacklist specific contacts
- Password-protects recordings against unauthorized access
- Allows recordings to be shared directly via email or messaging apps
- Supports playback through the phone’s speaker or earpiece
Pricing: The app is available in a free version with core features and a Pro version that unlocks cloud backup, additional format options, and ad removal. The Pro version is available as a one-time purchase or subscription.
Limitations: Like all third-party recording apps, performance varies by device and Android version. Users on newer Android versions (13 and above) may find that automatic recording works inconsistently depending on whether the device manufacturer still allows the relevant API access.
App 2: Cube ACR
Cube ACR distinguishes itself by recording beyond standard phone calls — it also captures audio from VoIP apps including WhatsApp, Skype, Viber, Facebook Messenger, Line, and others. For users who conduct business or personal calls across multiple platforms, this cross-app capability is genuinely valuable.
What it does:
- Records standard cellular calls on compatible devices
- Records VoIP calls from WhatsApp, Viber, Skype, and other supported apps
- Organizes recordings by contact, date, and app
- Free version includes core recording; premium tier unlocks cloud storage (Google Drive), PIN lock for recordings, and automatic deletion of old recordings based on configurable rules
Why it stands out: Most call recording apps are limited to traditional cellular calls. Cube ACR’s support for WhatsApp and other VoIP platforms makes it more versatile for users who’ve shifted away from cellular calls for their primary communications.
Limitations: VoIP recording depends on each app’s API access and is not guaranteed on all devices or Android versions. Performance on newer Android versions has been variable — check recent user reviews in the Play Store for the most current compatibility information.
App 3: ACR Phone — Call Recorder
ACR Phone takes a slightly different approach by bundling call recording with additional communication management features.
What it does:
- Automatic call recording with pre-call announcements (for compliance)
- Spam call blocking — screens and blocks numbers identified as spam before they reach you
- Cloud backup to Google Drive and Dropbox, making recordings accessible from any device
- Call notes — add text annotations to specific recordings for easy reference
- Advanced search — find recordings by contact name, phone number, or notes
- Privacy management features for recording access control
Why it stands out: The combination of spam blocking and cloud backup makes ACR Phone practical beyond just recording. The ability to search recordings by notes is especially useful for anyone recording calls for business or legal reference purposes.
Limitations: Some users report that the call announcement feature (which notifies the other party of recording) is forced on in certain configurations, regardless of the user’s region or preference. Review the app’s current settings carefully after installation.
How to Find Your Recordings on Android
Regardless of which recording method you use, you’ll eventually need to find the saved files. Here’s a systematic approach to locating recordings when you’re not sure where they ended up.
Method 1: Through the Phone App
If you used the built-in Phone app recording feature, the most direct path is through the app itself:
Open the Phone app → Recents tab → Find the recorded call → Tap it. If the call was recorded, a Play button or audio waveform will appear below the call details.
Method 2: Through the Files App
Open your device’s Files app (sometimes called File Manager). Tap the search icon and search for any of the following terms:
- “recording”
- “call”
- “rec”
- The name of your recording app (e.g., “ACR,” “Cube”)
This search will scan all folders on internal storage and return any matching files.
Method 3: Common Folder Paths
If you’d rather browse directly, check these common storage locations by manufacturer:
| Device | Typical Folder Path |
|---|---|
| Samsung | Internal Storage → Recordings → Call |
| Google Pixel | Internal Storage → Recordings |
| Xiaomi/Redmi | Internal Storage → MIUI → sound_recorder → call_rec |
| OnePlus | Internal Storage → CallRecordings |
| Third-party apps | Typically Internal Storage → [App Name] |
Method 4: Through the Recording App Itself
If you used a third-party app, open the app and look for a “Recordings,” “History,” or archive section within the app’s interface. Most recording apps maintain their own internal library that’s easier to navigate than raw file storage.
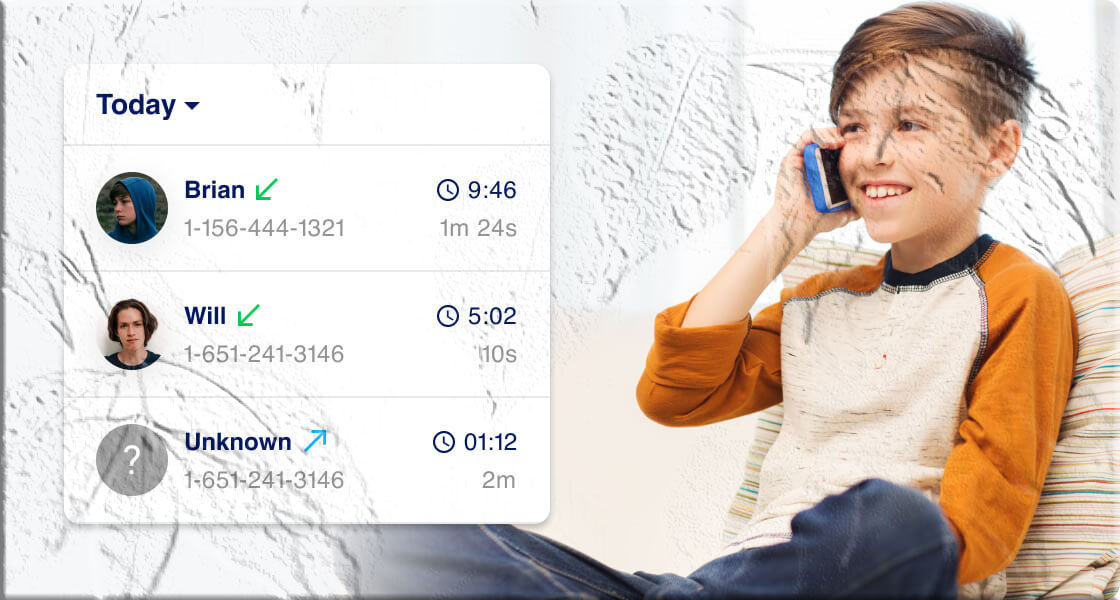
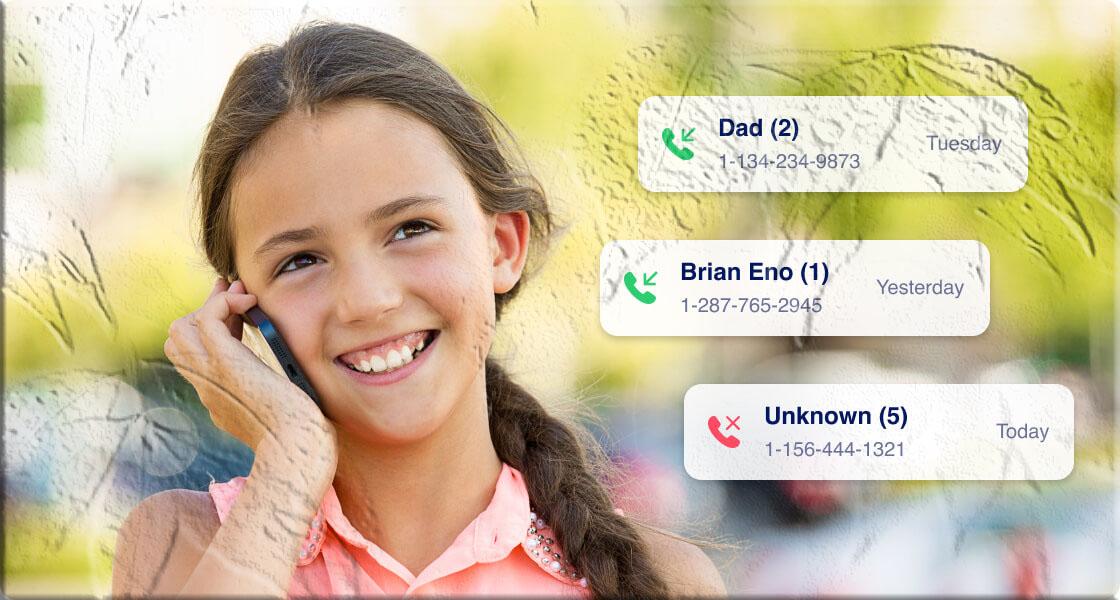
Bonus: Monitoring Your Child’s Phone Environment Remotely
Call recording tools are typically discussed in the context of capturing your own conversations — but for parents, there’s an adjacent need that standard call recording doesn’t address: knowing what’s happening around your child when you’re not physically present.
This is distinct from recording calls. It’s about real-time ambient awareness — the ability to know whether your child is in a safe environment, whether they’re where they said they’d be, and whether something unusual is happening around them.
Why This Matters
Children and teenagers spend a significant portion of their day away from home — at school, at friends’ houses, commuting, at after-school activities. For most of that time, a parent’s only real-time contact is a text or call that the child has to proactively initiate. If something is wrong, the child has to recognize it and reach out. For younger children especially, that’s not a reliable safety mechanism.
The American Academy of Pediatrics recognizes parental monitoring as a legitimate component of child safety in the digital era, while emphasizing the importance of age-appropriate privacy and open communication. The goal isn’t to create a surveillance state — it’s to have a safety net that can be activated when needed.
MyParental Parental Control: One-Way Audio Monitoring
MyParental Parental Control is a parental oversight app that includes, among other features, a One-Way Audio function that lets parents listen to the ambient sounds around a child’s Android phone in real time — without the child receiving a notification that the feature is active.
This is different from recording a call. It captures the sound environment of the room the phone is in: voices, background noise, whether the child is where they said they were. It’s designed as a safety tool, not a surveillance mechanism, and works best when the child knows the app is installed and understands that monitoring may occur.
How to set it up:
Step 1: Download the MyParental Parental Control app (parent’s device) and create an account.
Step 2: On your child’s Android device, install the MyParental Kids app from the Google Play Store and complete the pairing process using the code provided in the parent app.
Step 3: In the MyParental parent app, navigate to the One-Way Audio feature. Tap it to begin listening to the real-time ambient audio from your child’s device.
Step 4: The audio streams live to your device. You can also review location data, movement history, app usage, and other monitoring features from the same dashboard.
Other features relevant to family phone safety:
- Real-time GPS location — Know where the child’s device is at any given moment
- Geofencing alerts — Receive automatic notifications when the device enters or leaves a defined area
- App usage monitoring — See which apps are being used and for how long
- Screen activity — View what’s on the child’s screen in real time
- Content filtering — Block access to inappropriate websites and flag concerning keyword patterns
An important note on transparency: MyParental works most effectively — and most ethically — when used with the child’s knowledge. Research on parental monitoring consistently shows that children who know monitoring tools are in place and understand the reasoning behind them respond better than those who feel covertly tracked. The conversation that accompanies setting up an app like this is as important as the setup itself.
Frequently Asked Questions
Can you record a phone call on Android without the other person knowing?
In one-party consent jurisdictions, yes — you can record a call using the built-in Phone app or a third-party recording app without notifying the other party, provided your local laws permit it. In two-party or all-party consent jurisdictions, recording without notifying all parties is illegal. Google Voice always announces recording automatically, regardless of jurisdiction. Always check your local laws before recording without disclosure.
How do I record a phone call on a Samsung Galaxy?
Samsung Galaxy devices include a built-in call recording feature on most models in supported regions. During an active call, tap the three-dot menu (⋮) in the top-right corner of the call screen and select “Record Call.” Alternatively, enable automatic recording in Phone app → Settings → Record Calls. Recordings are saved to Internal Storage → Recordings → Call and are also accessible through the Recents tab in the Phone app.
Why doesn’t my Android phone have a call recording option?
If call recording doesn’t appear in your Phone app, it’s most likely because your device’s manufacturer has disabled the feature for your region due to local legal requirements, or your Android version doesn’t support it. In two-party consent regions, manufacturers often remove the option entirely or implement mandatory call announcements. The screen recording method (Method 2) or Google Voice (Method 3) may still work as alternatives.
How do I automatically record all calls on Android?
If your device supports built-in recording, go to Phone app → Settings → Call Recording → Always Record to enable automatic recording for all calls. For selected contacts only, choose “Always Record Selected Contacts” and add numbers to the list. If your device doesn’t have built-in recording, apps like Automatic Call Recorder Pro can provide automatic recording functionality on compatible devices.
Where are recorded calls stored on Android?
The storage location depends on the recording method: built-in Phone app recordings are typically in Internal Storage → Recordings → Call (Samsung) or Internal Storage → Recordings (Pixel). Screen recordings go to the Gallery app in a “Screen recordings” folder. Third-party apps like ACR maintain their own in-app libraries and also save to dedicated folders in internal storage. Use your Files app’s search function and search for “recording” or “call” to locate files regardless of where they were saved.
Can I record WhatsApp calls on Android?
Standard call recording apps don’t reliably capture WhatsApp audio because WhatsApp routes calls through VoIP rather than the cellular call system. Apps specifically designed for VoIP recording — particularly Cube ACR — support WhatsApp call recording on compatible devices, though compatibility varies by Android version and device. The external device method (using a second phone with speaker mode) reliably captures WhatsApp calls regardless of software limitations.
Is Google Voice call recording free?
Yes, Google Voice’s call recording feature is included in the free tier of the service. You need a Google account and a Google Voice number to use it. The recording feature only works for incoming calls to your Google Voice number, and it always announces recording to all parties before it begins. Recordings are stored in the Google Voice app and can also be emailed to your account.
What’s the best call recording app for Android?
For most users, Automatic Call Recorder Pro offers the most reliable combination of features and compatibility across Android versions. For users who need to record VoIP calls from WhatsApp, Skype, or Viber in addition to cellular calls, Cube ACR is the stronger choice. For users who want cloud backup and spam blocking bundled with recording, ACR Phone is worth considering. All three have free versions for initial testing before committing to a paid plan.
Conclusion
Android gives you more options for recording phone calls than most platforms — the question is usually which method fits your device, your region, and your use case.
The built-in Phone app is the cleanest solution if it’s available in your region — no extra apps, no workarounds, and the best audio quality. Google Voice is the most legally compliant option for users who want an automatic announcement to all parties. The screen recording method is a capable fallback when dedicated recording features aren’t available. Third-party apps like Automatic Call Recorder Pro and Cube ACR extend call recording to devices and call types the built-in features can’t reach. And external devices offer a hardware-level solution that works regardless of software restrictions.
For parents, the parallel question of monitoring a child’s phone environment — beyond just recording individual calls — is addressed by dedicated parental control tools like MyParental, which provide real-time ambient audio monitoring alongside a broader suite of safety features.
Whatever your reason for recording, the same principle applies throughout: understand the legal requirements in your jurisdiction, communicate clearly when consent is required, and choose the method that fits the actual use case you have in front of you.
This article is for informational purposes only and does not constitute legal advice. Call recording laws vary significantly by country, state, and region. Always consult the applicable laws in your jurisdiction and obtain necessary consents before recording any phone call.